Material density detection system used to create wet wipes with Arduino 2/2

Imagen
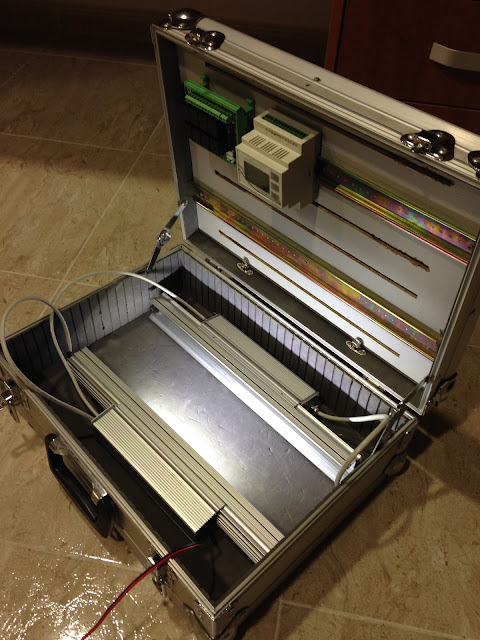
Construction of the final prototype Components used The components used have been, per module: Density Bar 1 - Arduino Pro Mini 5v 4 - LDRs 4 - Resistors 1k 2 - PCB Terminal Blocks Communication bar 1 - Arduino Pro Mini 5v 1 - LM2596s DC-DC step down power supply module 2 - PCB Terminal Blocks 1 - Voltage regulator TIP220 1 - Heat Sink for TIP220 1 - Rectangular LED 6W 630lm 6500K COB 170 x 15 mm. Industruino 1 - Industruino PROTO kit 1 - Relay module Keyes_SR1 Arduino with screen 1 - Arduino UNO R3 1 - 16x2 Character LCD module with I2C 3 - Resistors 10k 2 - Resistors 220 1 - LED Red 1 - LED Green 3 - Buttons 1 - Relay module Keyes_SR1 Assembly of the circuit The Fritzing scheme is as follows: Density bar Circuit that manages the density bar This circuit is responsible for obtaining the measurements and send notifications to the communications bar for redirection. Communication bar Circuit that manages the c

Opening system of a showcase with arduino


Description

The purpose of the project is to create a system of selective opening of shop windows.
The requirements are:
  • There are a total of 8 windows.
  • They must be able to open each of the 8 windows independently.
  • They must be able to open all the windows at once.
  • The time during which the locks must be opened is 1 minute.
  • There are 3 bolts for window.


Instructions

Components used

The components used have been:

Assembly of the circuit

The Fritzing scheme is as follows:

As can be seen in the following images, the system has been mounted on a pcb board 9x15.
The power supply has been chosen of 30A because each of the bolts uses 900 mA and there are 24 of these.
The LM2596S module has been used to reduce the input voltage to the Arduino from 12V to 6V.
Images of the system mounted inside the laboratory:
Upper detail of the assembled PCB.
Bottom detail of the assembled PCB.
Keyboard and relay block.

Connection of the relay block.

Complete system.

Software

To verify the address I2C of the relay block has been used the program called Arduino I2c Scanner.
The libraries used have been:
  • I2C_RL8xxM: library used to access the relay block.
  • Wire: library used to I2C connections and is a dependenciy of the I2C_RL8xxM library.
  • keypad: library used to manage the membrane keypad 4x3.
The code of the Arduino is the following:

Complementary and additional places in which the article has been published:


Comentarios

Entradas populares de este blog

Material density detection system used to create wet wipes with Arduino 2/2

Sistema de detección de la densidad del material usado para crear las toallitas húmedas con Arduino 2/2

Sistema de detección de la densidad del material usado para crear las toallitas húmedas con Arduino 1/2